-本日のアジェンダ-
1限目
学科 HTML/CSS基礎⑧
Webページ制作実践
2限目
学科 HTML/CSS基礎⑧
Webページ制作実践
3限目
学科 HTML/CSS基礎⑧
Webページ制作実践
4限目
学科 HTML/CSS基礎⑧
Webページ制作実践
5限目
学科 HTML/CSS基礎⑧
本日の講義のまとめ
本日のテーマ
Webページを完成させましょう
Webページ制作実践④
横並びのレイアウトを組んでみる
htmlは基本的に縦にレイアウトが積まれていきますが、cssのプロパティを使って横並びにする事ができます。
今回はcssのflexboxを使って、横並びのレイアウトを作ってみましょう
<!doctype html>
<html>
    <head>
     <meta>〜〜〜
     <meta>〜〜〜
     <title>〜〜〜</title>
        <link href="style.css" rel="stylesheet">
    </head>
    <body>
        <div class="oya">
           <div class="kodomo_a"></div>
           <div class="kodomo_b"></div>
           <div class="kodomo_c"></div>
        </div>
    </body>
</html>
.oya {
display: flex;
}
.kodomo_a{
width: 200px;
height: 200px;
background: red;
}
.kodomo_b{
width: 200px;
height: 200px;
background: blue;
}
.kodomo_c{
width: 200px;
height: 200px;
background: green;
}横積みのレイアウトを組むことが出来れば、ワイヤーフレームをhtmlとcssで作成する事ができます。
HTMLで表を作る
時刻表やメニュー表、カレンダー等はtableタグを使ってレイアウトを組むことが多いです。
HTMLでフォームを作る
WEBサイトに設置されているお問い合わせページなどをフォームと呼びます。htmlでフォームを作る際、html単体でフォームは動きません。(別途phpなどでプログラムを組む必要があります)今回は、htmlで擬似お問い合わせフォームを作成してみましょう。
本日の課題
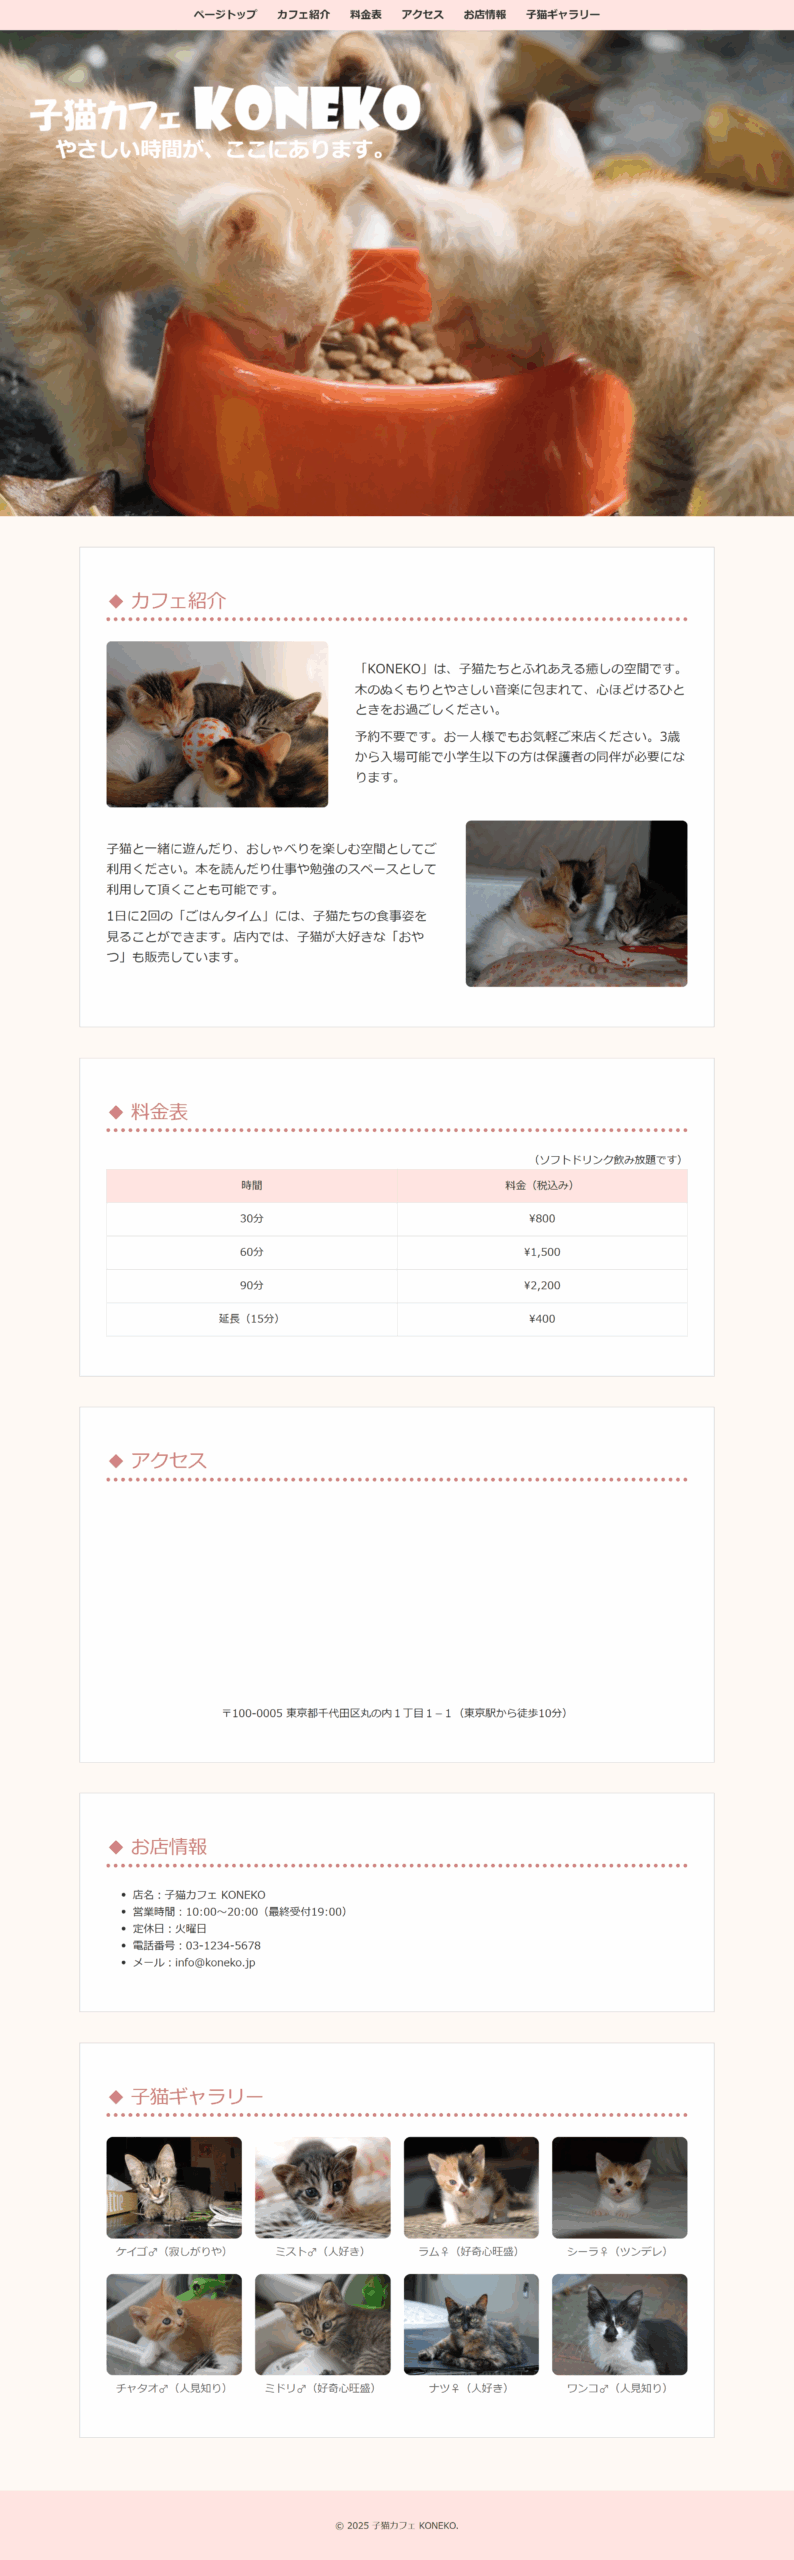
Webページ制作実践で作成したページのキャプチャを取得してWordPressの投稿ページに貼り付けを行いましょう。(出来たところまでで大丈夫です)です)
@charset "utf-8";

body {
	background-color: #fffaf5;
	color: #333;
}

.navbar {
	position: fixed;											/* 問題01:要素の配置指定 */
	top: 0;												/* 問題02:要素の位置指定 */
	width: 100%;
	background-color: #ffe4e1;
	box-shadow: 0 2px 4px rgba(0,0,0,0.1);
	z-index: 1000;
}

.navbar nav ul {
	margin: 0;
	padding: 10px 0;
	display: flex;
	justify-content: center;
	list-style: none;
}

.navbar nav ul li {
	margin: 0 15px;
}

.navbar nav ul li a {
	text-decoration: none;
	color: #333;
	font-weight: bold;
}

.hero {
	position: relative;
	height: 100lvh;
	overflow: hidden;
}

.hero video {
	width: 100%;
	height: 100%;
	object-fit: cover;
}

.hero .hero-text {
	max-width: 600px;
	position: absolute;
	top: 60px;
	left: 40px;
	color: #fff;
	line-height: 1.2;
}

.hero .hero-text h1 {
	max-width: 100%;
	margin: 40px 0 0 0;
	font-size: 4em;
}

.hero .hero-text h1 img {
	width: 100%;
	height: auto;
}

.hero .hero-text p {
	font-size: 2em;
	font-weight: bold;
	text-align: center;
}

.section {
	margin-top: 46px;
	padding: 60px 40px;
	background: #fff;
	border: 1px #ccc solid;
}

.container {
	max-width: 960px;
	margin: 0 auto;
}

.section img {
	max-width: 100%;
	border-radius: 8px;
}

.section h2 {
	font-size: 1.8em;
	margin: 0 0 30px 0;
	color: #d08080;
	border-bottom: 6px #d08080 dotted;
}

.section h2::before {											/* 問題03:コンテンツの挿入 */
	content: "◆";											/* 問題04:挿入コンテンツ指定 */
	padding-right: 8px;
}

.section.about {
	padding: 60px 40px 40px 40px;
}

.section.about .about-wrapper {
	padding: 0 0 20px 0;
	display: flex;											/* 問題05:フレックスレイアウト指定 */
	align-items: center;
	gap: 40px;
}

.section.about .about-wrapper.reverse {
	flex-direction: row-reverse;									/* 問題06:フレックスアイテムの並び順指定 */
}

.section.about .about-wrapper img {
	width: calc((100% - 40px) * 0.4);
}

.section.about .about-wrapper div {
	width: calc((100% - 40px) * 0.6);
}

.section.about .about-wrapper div p {
	padding: 5px 0;
	font-size: 1.2em;
}

.section.pricing p {
	margin-top: 20px;
	text-align: right;
}

.section.pricing table {
	width: 100%;
	border-collapse: collapse;
}

.section.pricing table th, .section.pricing table td {
	width: 50%;
	border: 1px solid #ddd;											/* 問題07:テーブルセルのボーダー指定 */
	padding: 12px;											/* 問題08:テーブルセルのパディング指定 */
	text-align: center;										/* 問題09:テーブルセルの文字配置指定 */
}

.section.pricing table th {
	background-color: #ffe4e1;									/* 問題10:テーブル見出しの背景色指定 */
}

.section.access iframe {
	width: 100%;
	height: 300px;
}

.section.access p {
	text-align: center;
}

.section .gallery-grid {
	display: flex;
	gap: 20px;
	flex-wrap: wrap;											/* 問題11:フレックスアイテムの折り返し指定 */
}

.section.info ul {
	margin-left: 40px;
}

.section .gallery-grid div {
	width: calc((100% - 60px) / 4);
	text-align: center;
	line-height: 1;
}

.section .gallery-grid div img {
	width: 100%;
	border-radius: 10px;										/* 問題12:ボーダーの角の丸み指定 */
}

.section .gallery-grid div p {
	margin-top: 8px;
	color: #666;
}

footer {
	padding: 40px 0;
	margin-top: 80px;
	text-align: center;
	background-color: #ffe4e1;
	box-shadow: 0 2px 4px rgba(0,0,0,0.1);
}
3つぐらい、一から作っていくとよい